Sometimes Dialogic is just not enough.
Whether it’s an event, an editor, a setting or a text effect that is missing, you can add it. An extension is a folder that contains all the information about these things so that Dialogic can use it. Extensions are powerful. Actually, it’s just as powerful as Dialogic’s built-in stuff because they are the same.
Extensions can add:
- main editors
- events
- subsystems
- text effects & modifiers
- portrait animations
- settings
- character settings
- layout presets
- Dialogic nodes.
📜 Table of Contents
- 1. Getting started
- 2. The essential part:
index.gd - 3. Custom events
- 4. Custom Subsystems
- 5. Custom animations
- 6. Custom dialogic nodes
- 7. Custom Settings Pages
1. Getting started
The best way to create an extension is to use the extension creator in the dialogic settings (General).
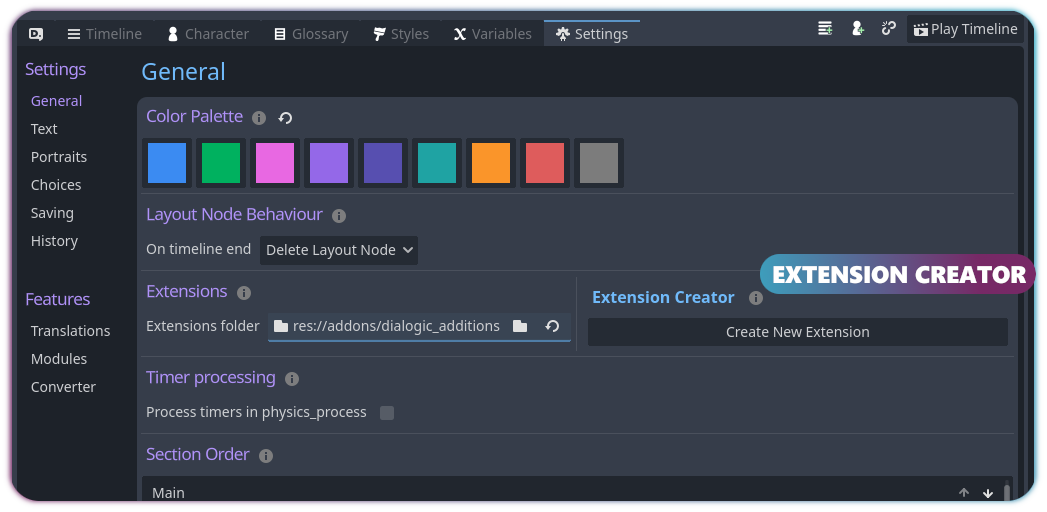
By clicking the Create New Extension button, you can set up an extension folder and a custom event script. Enter a name for the new module and select what you would like to add. Then click Create. This should create a folder inside your extensions folder with two scripts: index.gd and event_(module name here).gd.
Warning
Existing files will be overwritten!
2. The essential part: index.gd
The central piece of any extension is the index.gd script. It is the only thing your extension is required to have. It has to extend DialogicIndexer and can overwrite that class’s methods to let Dialogic know what things to add.
For example, this code registers a custom event:
func _get_events() -> Array:
    return [this_folder.path_join('event_print.gd')]
Check out the DialogicIndexer’s other methods to learn how to register other things.
3. Custom events
What is an event?
A Dialogic event is a script that defines a new class inheriting DialogicEvent. This script will define (a) how the event is represented in-editor, (b) how it is saved, and (c) what it does during timeline execution when the event is reached.
Often, events work together with subsystems.
Your custom event
The Extension Creator allows you to get a basic event script. It has already set some values for you.
These are the things you need to do to make your event fully functional:
3.1 Event settings/parameters/properties:
All options for your event (i.e. parameters you can “pass” to your event) should be stored in variables. Define these at the top.
var print_text: String = ""
var in_game: bool = false
3.2 Execution code:
Add whatever should happen when your event is reached in the _execute() method:
func _execute() -> void:
    print(print_text)

    if in_game and Dialogic.has_subsystem('Text'):
        Dialogic.Text.update_dialog_text(print_text)
    else:
        finish()
The finish() method lets Dialogic know to continue with the next event.
3.3 General settings:
In the _init() method, you can set some base settings of your event:
func _init() -> void:
    event_name = "Printer"
    set_default_color('Color3')
    event_category = "Godot"
You can change the events icon by putting an icon.svg or icon.png file next to it’s script, or by overwriting the _get_icon() method and returning a Texture2D.
3.4 Saving & Loading (i.e. parsing, representation in timeline’s text editor)
We will cover working with shortcodes now. They are pretty much the text view of an event inside the timeline. The following is the shortcode for the Background event.
[background arg="res://Graphics/Backgrounds/sunset.png" fade="1.5"]
To implement saving your shortcuts, return a shortcode identifier in get_shortcode() and fill out get_shortcode_parameters():
func get_shortcode() -> String:
    return "print"


func get_shortcode_parameters() -> Dictionary:
    return {
        #param_name       : property_info
        "text"            : { "property": "print_text", "default": "" },
        "ingame"          : { "property": "in_game",    "default": false },
    }
The above event might be saved as [print text="Some text to print" in_game="true"]
3.4.1 Troubleshooting
If your variables are not changing despite setting values in your custom event in the timeline editor, here is a little checklist:
- Remember the name of your variable; example variable name:
_audio_path. - Check the
get_shortcode_parameters:- This would be correct:
"path" : { "property": "_audio_path", "default": "" }, pathappears as text in the shortcode text view; this can match your variable.- The
propertyvalue must match your variable, see_audio_path.
- This would be correct:
- Check
add_header_editincludingadd_body_editand others:-
The very first parameter is the
variable_name, this must match your variable. -
An example:
add_header_edit(
	"_audio_path",
	ValueType.SINGLELINE_TEXT,
	{
		"left_text": "File Path",
		"mode": 1,
	},
)
-
After all of these values match, the visual and text modes will both change the variables in your event, and you can access them in the _execute.
3.4.2 Custom Saving & Loading Syntax
You can also implement custom saving syntax by overriding the function to_text() -> String and from_text(timeline_event: String).
The is_valid_event(event_name: String) -> bool needs to be override too, if you want to quickly check if the event name is correct.
When is custom saving and loading useful? If your shortcode has a special text syntax or is converting between values, map a word to an integer.
This is what the text-, character-, choice-, condition-, and variable events do, so take a look at them if this is something you are interested in.
A good example of this is the Comment event, which you can find under addons/dialogic/modules/comment.
3.5 Visual Editor fields:
Your event is now fully functional, but in the visual editor, it is still blank. You will need to override the build_event_editor() method to define the fields/texts that will appear on the event.
func build_event_editor() -> void:
   add_header_edit("print_text", ValueType.SINGLELINE_TEXT)
   add_header_edit("in_game", ValueType.BOOL, {"left_text":"(also show it in game:", "right_text":")"}, "!print_text.is_empty()")
Other methods you can use are add_header_label(), add_body_edit() and add_body_line_break(). Most of these allow setting a condition as the last parameter, allowing for adaptive visibility. In the example above, the second field will only be visible if any text is typed in the first.
If you would like to learn more about events, I strongly suggest looking at the built-in events.
3.5.1 Troubleshooting
If your custom event does not show up in the visual editor, but functions when written in the text editor, considering restarting Godot for changes to take hold.
4. Custom Subsystems
What is a subsystem?
A subsystem is a script that contains useful methods for game execution. Subsystems can be accessed as Dialogic.SubsystemName.method() when running the game. They should contain all of your extension’s code.
For example, built-in subsystems include Text, Portraits, Choices, Audio, etc.. Their methods are used by the built-in events and can be used by your events as well.
Additionally, it’s good if a subsystem manages dialogic nodes. This could be done like this:
func update_my_dialogic_nodes(some_setting):
    for node in get_tree().get_nodes_in_group("dialogic_custom_nodes"):
        node.update_something(some_setting)
Your custom subsystem
A subsystem is a script inheriting DialogicSubsystem. It can override that class’s methods.
The most important methods you might want to override are clear_game_state() and load_game_state() for saving and loading, and pause() and resume() for pausing.
If you want to save persistent data, store it in the Dialogic.current_state_info dictionary.
5. Custom animations
What is an animation?
Portrait animations are scripts extending the DialogicAnimation class. The easiest way to register them is to have them in a subfolder of your module, and then add the following code to the index.gd file:
func _get_special_resources() -> Array[Dictionary]:
    # First argument is the sub-folder, the second specifies
    # what kind of resource this is (needed for Dialogic)
	return list_special_resources('MySubFolder', &'PortraitAnimation')
Creating an animation
Animations are little scripts inheriting the DialogicAnimation class; you can take a look at the default ones (they use tweens) at dialogic/Modules/Character/DefaultAnimations.
Your animation script should look something like this (bounce_in, for example):
Animation Example Bounce
extends DialogicAnimation

func animate():
    var tween := (node.create_tween() as Tween)
    node.scale = Vector2()
    node.modulate.a = 0

    tween.set_ease(Tween.EASE_IN_OUT)
    tween.set_trans(Tween.TRANS_SINE)
    tween.set_parallel()
    tween.tween_property(node, 'scale', Vector2(1,1), time).set_trans(Tween.TRANS_SPRING).set_ease(Tween.EASE_OUT)
    tween.tween_property(node, 'modulate:a', 1.0, time)
    tween.finished.connect(emit_signal.bind('finished_once'))
Note
Be aware, you have to:
- extend the
DialogicAnimationclass and implement theanimate()method- at some point emit the
finished_oncesignal; it’s called like this because animations can be repeated by Dialogic
You have the following variables to work with:
- node = the node to animate. This is NOT your portrait node directly, but a Node2D that holds that portrait node
- time = the amount of time the animation should take
- end_position = where to end the animation
- orig_pos = the position you started at
Naming animations
Importantly, the name of your animation file will determine if it is a Join, Leave or Update animation! If it ends with _in or contains _in_ it is a Join animation; ending in _out or containing _out_ makes it a Leave animation, while all other names are considered Update animations (often called attention seekers in other software).
6. Custom dialogic nodes
What are dialogic nodes?
Dialogic nodes are nodes that, in some way, execute something visibly, logically or audibly. They are generally managed by a subsystem and are found because they are automatically added to a group. This makes sure it doesn’t matter where they are in the scene tree or how many of them exist.
DialogicNodes does not need to be added to the index.gd file!
7. Custom Settings Pages
An extension might want to add a dialogic settings editor. This is just a UI scene that has a script inheriting DialogicSettingsPage.
- Overwrite some methods (just the ones that you need)
_get_title()- _get_priority() -> return an integer that will influence the order of settings pages
- _refresh() -> whenever the settings are opened
- _about_to_close() -> whenever the settings editor closes
- _get_info_section() -> return a node in your scene that will be used as an info section Settings are usually saved either
- in the
project settingsin a subcategory of dialogic (e.g.dialogic/myextension/setting):ProjectSettings.set_setting('dialogic/myextension/setting', some_value)
- You can also save/load editor settings with
DialogicUtil.set_editor_setting('setting', value)andDialogicUtil.get_editor_setting('setting').- These depend on the project
- Remember that all scripts in this scene must be in @tool mode.